|
Rear Disc Brake Kit from Jeff's
Bronco Graveyard | |
|
Please note: Technical Data provided by Jeff's Bronco
Graveyard and TSM
| |
 |
 |
|
After a scary run through flooded Terminator, it was quickly evident that wet drum brakes will not hold you going down hill. Everyone on that run felt failure in there rear brakes coming around the bypass on White Line. I know for those of us running drum brakes, we have all felt that "Oh NO!, no brakes" when crossing our favorite stream to cool off or rinse the daily mud off the underside. Earlier in the year I managed to get all the parts together to convert my Bronco to front disc brakes, using the Che*y conversion. It was an awesome improvement over drum/drum but when you get to Moab and you are coming down off of some of those fins and bumps you want ultimate control over your truck without sliding! We immediately contacted Dana at Jeff's Bronco Graveyard for their rear disc solution.
| |
|
Tools needed: 13/16", 11/16", 5/8", 9/16" socket, 1/2" ratchet, 11/16", 5/8", 9/16", 3/8", 5/16" boxed end, pliers, Torque wrench, bleeder hose, motivated helper to bleed brakes Installation Time: Approximately 4-6 hours by an average home mechanic. If you are not confident in your abilities please take this kit to a professional for installation.
| |
|
First thing to do is tell Jeff's Bronco Graveyard the exact dimensions of your axle. This is critical to them getting you the right kit! Kit's Parts List:
These calipers can be used with this kit:
FRONT CALIPERS
REAR CALIPERS
FRONT CALIPERS
REAR CALIPERS
| |
| Rear Disc Brake Installation Instructions (101) | |
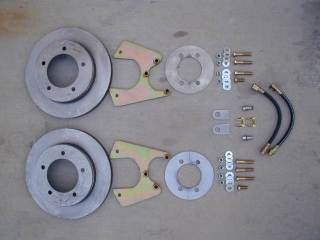 |
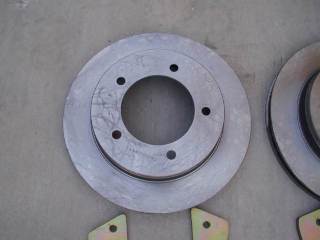
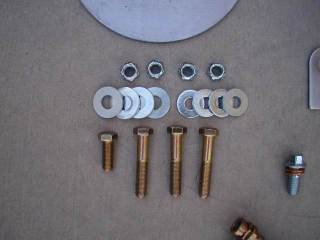
This is a detailed picture of the parts that I received from Dana at Jeff's Bronco Graveyard. I also ordered the flexible brakes lines that are not included in the basic kit. |
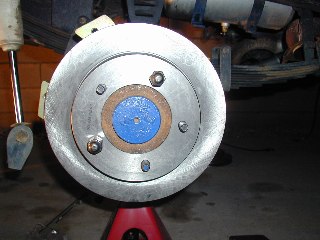
| Vented rotors supplied. They are a very tight fit over the lug studs. They also have a very nice cross hatching on the rotor surface. |
|
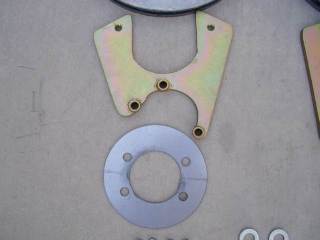 |
These are the supplied brackets and the spacer plates. The spacer plates are required to take up the space where the drum brake backing plate used to be. |
|
All hardware supplied with this kit is top quality. |
 |
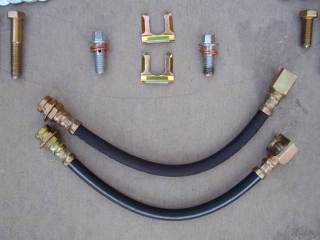 |
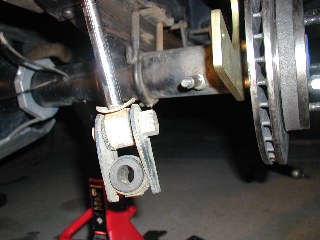
Since the caliper floats on the mounting plate you need flexible lines to go from the caliper to the hard lines on the axle. Tabs have to be welded to the axle tube to support the connection point. |
|
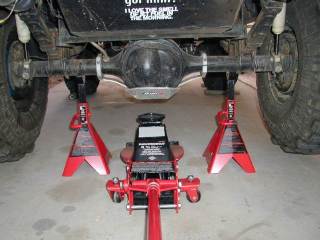
First thing to do is to block the front wheels so the truck will not roll while jacking the rear. Place jack stands under the axles for safety. |
 |
| |
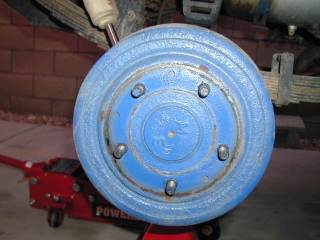
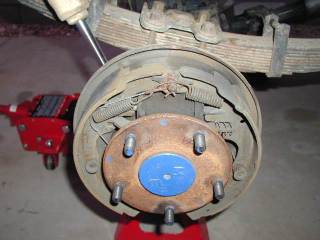
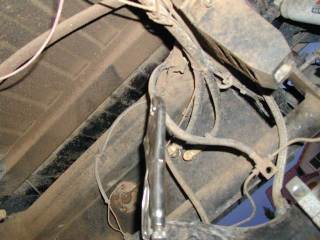
The drum may take a little coercion to remove. If the brakes are too tight and wont let the drum go, use the slot on the back side of the backing plate and use a screw driver to back off the adjuster. |
|
Once the drum is removed there are 4 nuts holding the axle retainer on. Remove these to remove the axle. |
 |
 |
Be sure to clamp off the main flexible brake line so when you disconnect the brake cylinders you don't loose all your fluid in the system due to gravity. |
|
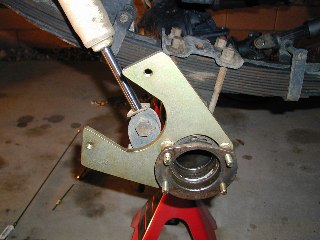
Install the caliper brackets with the shoulders facing the outside and the caliper opening up and towards the rear. |
 |
 |
Use the spacer plates (washers) between the bearing retainer plate to take the place of the backing plate, and the large washers before the nuts. |
|
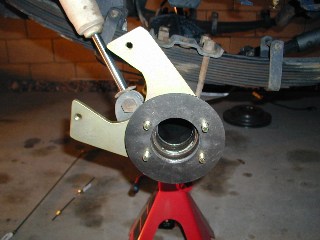
Install the axles and torque the nuts to 50 ft. lbs. |
 |
 |
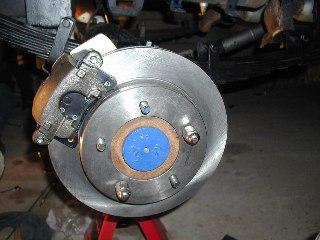
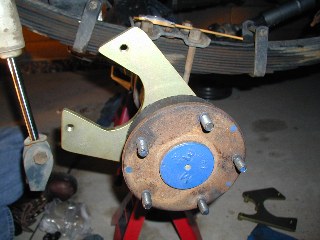
Next install the rotors. They will be a tight fit so you might have to use a rubber mallet. Then put on a couple of lug nuts to hold in place. |
|
Rotate the rotors and check for wobble, if there is any, check for interference in the mating surfaces, if not then the axle and rotor bolted together should be faced. All clearances looked great on my application. No further work needed. The brackets were checked to make sure they were parallel with the rotors. Shim or grind the sleeves on the brackets to true up if needed. |
 |
| |
I then went down to Autozone and purchased a loaded set of calipers from a 1985 El-Dorado with the e-brake. All I had to do it bolt them onto the caliper bracket. Make sure the bleeding screw is up on the install. |
|
| |
|
Detailed instructions are included with every kit. If you run into any problems, Dana and the guys at Bronco Graveyard will personally help you through every step. Just in case you have additional problems with your brakes or you master cylinder does not work properly, there are proportioning valves, residual valves, etc. available to help correct your problem. A lot of this information is included in the instructions.
| |
|
I have not worked the e-brake issue yet. I have to go junkyard shopping to locate the needed brackets to adapt my cables to the disc caliper. I will update as soon as I get that done. Testimonial: Since I installed the kit we were able to attend the Moab Bronco Safari 2001. Last year I had disc in the front and drum rear. I noticed that I skidded in the rear down a lot of the steep stuff. This year with the disc/disc I was able to carefully descend the steepest ledges and HELLS GATES with no skidding. I love the additional control I had and a huge piece of mind that I was not going to suffer brake failures due to water, as it rained the first three days I was there. Thank you Jeff's Bronco Graveyard for all your help! | |
|
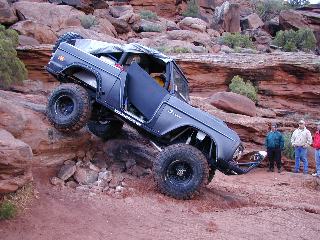
Rusty Nail Trail, Moab Utah Bronco Safari 2001
| |
|
Property
of Greg Banfield and
| |