 | |
| Performance Unlimited
Bullet Proof Steering Installation Story and Pictures by Greg Banfield, Early Bronco Editor | |
|
Please note: Technical
Data provided by Performance Unlimited | |
|
| |
|
Now that we have installed the James Duff / AGR steering box and pump, we found the next weak link! The drag link and tie rod. I noticed that my tie rod was bent in two different directions and my drag link was about to come apart at the pitman arm. What to do? I checked with the favorites (i.e. James Duff, Wild Horses 4x4, BC Bronco, K Bar S, etc.) to find a replacement. The OEM stuff is very expensive and has proven to be less than adequate on my project Bronco. Another great source of inspiration and information is the EBML (Early Bronco Mailing List). A posting was made to see what the general crowd is doing for these situations. People are using Chevy 1 ton rod ends, re-tapering the knuckles to fit, they are using spherical rod ends with DOM tubing, and many other conversions. Another popular conversion includes moving the tie rod on top of the knuckle to improve clearance. As with most of us, so many ideas, so little time and money! One of the postings from the EBML suggested looking at Performance Unlimited's Bullet Proof™ Steering System. Now who doesn't like the idea of a bullet proof steering system? Upon talking to Randall at Performance Unlimited he assured us that all units are custom made for your specific application. His system utilizes high grade spherical rods end, DOM tubing and Aircraft grade hardware to give you that sports car feel again and not leave you broke on the trail and all for a very modest price. We tried to beat his deal and found ourselves deeper in our pockets, with a ton of labor to boot! The wheels were in motion now. Specifications on the Bronco were sent to Randall. The types of measurements needed are displayed here on PU's site: http://performanceunlimited.com/steering/measurementform.html Tools needed: 3/4" socket, 1/2" ratchet, 3/4" boxed end, pliers, drill, 3/4" & 5/64" cobalt drill bit, Loctite® #271, Hacksaw / Die Grinder, 15/16" wrench, 1 1/8" wrench (2), Torque wrench Installation Time: Approximately 4-6 hours
| |
|
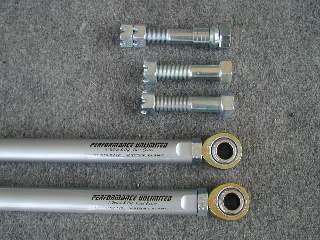
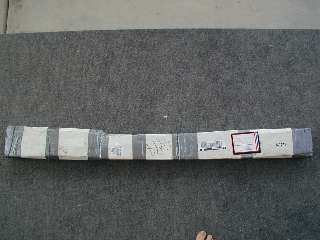
One week later the box arrives on my doorstep! First thing to do was to inventory the parts. A detailed parts list is included to compare too. |
 |
|
|
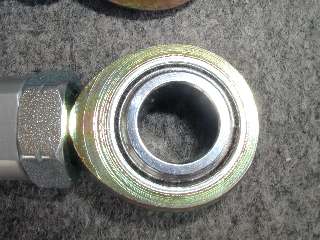
After a quick inventory, it left me thinking: "Is this it?" Wow, it couldn't get much simpler." On to the install. One neat thing about this product is you can opt for the tie rod over knuckle installation to get that added clearance. We need all the help we can get here in AZ with these rocks! Check out these beefy rod ends. |
|
Also noted with the instruction sheet were the specs on each part included in the kit. They read as follows:
| |
| Steering System Installation Instructions (101) | |
|
Now, as you'll see, these installation instruction are extremely easy to follow. Just about anyone can accomplish this task. Just ask my faithful bambino. This is just a general overview for installation and your kit will have specific instructions for your vehicle. |
 |
|
|
After a careful inventory of the parts, move out to the vehicle and take a close look at the front end. Make sure you block the wheels so the vehicle is stable. Do not lift the front end as you want to keep the alignment of the tires as close as possible on re-assembly. (Please note that I was in the middle of a disc brake conversion so my tires were off the vehicle at the time of installation) With an impact, remove the nuts on the tie rods where they connect to the knuckle. Using a hammer or a pickle fork, force the tie rod out of the knuckle. Repeat the same process for the drag link at the pitman arm. |
|
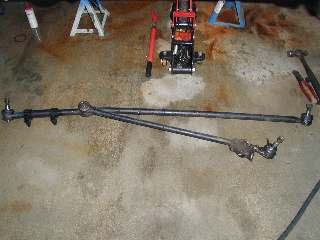
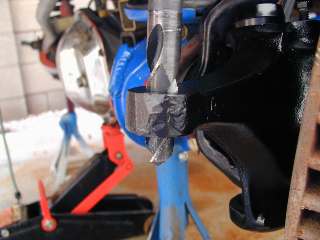
Once my old steering system was removed, I could see how twisted up it really was. It will be nice to have everything straight again. Now on to the fun stuff! I opted for the tie rod under knuckle because of the track bar angle and my use of a drop pitman arm. If you have a straight stock pitman arm you could go with the knuckle over option. This would gain you about 2-3 inches of clearance. For this next step I went to home depot and bought a brand new 3/4" bit to drill the knuckles and pitman arm. It is very important to get the holes straight and true as possible. I opted to do the drilling right on the vehicle and not remove the pitman arm or the knuckles, which worked out great. |
 |
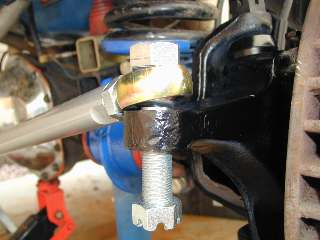 |
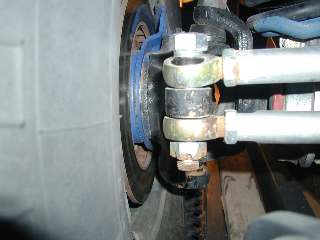
After all the holes were drilled, a test fit of the bolts were in order. What a perfect fit. Next, I grabbed the tie rod and on the driver's side installed the bolt and new tie rod end. I hand threaded the nut till snug. Then on the passenger side with someone helping to hold up the other end, I installed the tie rod, spacer, drag link, spacer and ran the nut snug. Then proceeded to the same at the pitman arm. Spacer, rod end, spacer, nut. Now torque all the bolt and nuts to 150 ft/lbs. Make sure you use Locktight RED on all fastening hardware. |
|
Next, it was time to measure a few things. On an early Bronco you want to maintain 1/8 - 1/4 toe in. Measure the distance from the centerlines of the front of the tires and write it down. Now from a center line on the rear of the tires measure. You should be an 1/8 -1/4" closer with the front measurement. Adjust the length of the tie rod by loosening the jam nuts till you have the correct distance. Once this is achieved, tighten the jam nuts tight. Please have a qualified technician recheck your work. | |
 |
Next, adjust the length of your draglink so you have an equal amount of turns in your steering right to left. Start where your steering wheel is in the center. Count the total turns to the left and then to the right. adjust the drag link till these are equal. Tighten the jam nuts and you are done. |
|
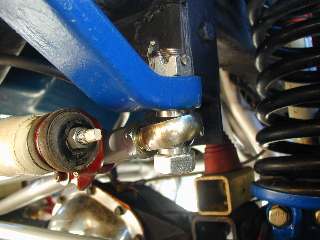
Ok, now it's time to put in the safety aspects of this system. Using a 5/32" drill bit, drill a hole through the bolt so the bolt can be cotter pinned through the castle nut (or safety wired). Once each bolt is cotter pinned, use a cutoff wheel to cut the excess bolt off, near flush with the bolt for better clearance. |
 |
 |
Now it's time to go over everything again to make sure all was assembled correctly. Maybe check the toe in one more time to be sure it was right on. Cycle the steering back and forth to make sure there is no binding. Now it's time for a test drive. Be prepared!!!! It will feel like you are driving a new sports car and not a Bronco! It was so tight and sure feeling. Made me wonder why I did not do this sooner. I immediately took it over to my favorite earth ramp to check out the flex and to make sure the new system didn't have any interference issues. All was good. |
|
Detailed instructions are included with every kit. If you run into any problems, Randall will personally help you through every step. He is a great guy and fun to talk too! By the way Randall, thanks for the pictures of your Bronco walking on water! Pretty impressive! I would have to say this is one of the best upgrades that I have done to my Bronco in 12 years of ownership. You will not be disappointed in the quality and workmanship from Performance Unlimited. They have earned my repeat business and many referrals. Don't forget these systems are not limited to Broncos. They will custom build steering systems on many different rigs! Additional information on Performance Unlimited's products can be found at: http://www.performanceunlimited.com/ Additional information about their steering systems can be found at: http://www.performanceunlimited.com/steering
Ok, it's been a couple of months now! Click here to see how the BulletProof™ tie rod has held up to punishing California dunes and Arizona rocks!! | |
|
Property
of Greg Banfield and
| |